Showing posts with label Tips and Tricks. Show all posts

Thursday, January 26, 2012

The Importance of the Perfect Card: Inside and Out {guest post by annie}


Cardmaking. It's not just the act of sticking paper on paper and scrawling an inscription on the front. I believe cardmaking to be an art, a way of producing works made with skill and imagination. 
Whether it be some tacky bit of dollar store junk from the aunty who's never seen and only ever whispered about, or a handmade treasure from someone you love, everyone enjoys opening a card and seeing the message inside or the ten dollar note fall out. That's why I think it is important to make the outside just as special as the inside.

 Now this, if I may say so myself, is an awesome card. It has depth, creativity, and a LOT of colour. It would be perfect for the fun, enthusiastic type of girl, but probably not for the guy. However, turn the pinks into orange or red and the purples to green or blue and voila!
  The card took me about an hour to finish, and around 20% of that was taken up on this part alone, the spiky circle, as I can but lamely put it. But try imagining this card without the spiky edged circle and instead with a smooth edge. It takes away from the card significantly, as it loses the spice. Some things are definitely worth the time and effort.
So there you have it. Remember, however cliched this may sound, the important thing about cardmaking is to have fun! Not every card you make is going to be super impressive, but I guarantee it will be an experience, a lesson and a pleasure.


About The Author

Hello! My name is Anwyn, but please, call me Annie.
I am a lover of cardmaking, mochas, sunny days, surfing,
Christmas, movies, friends, guitar and Jesus. Come check
out my blog @ A Cardmaker's Diary: Snippets and Scraps.

Friday, January 20, 2012

Tips for Photography: a Guest Post


Hi there!  My name is Natalia, and I'm a photographer.  This does not mean I have nice equipment, fancy props or a large portfolio of perfect images.  It simply means I take pictures and I enjoy it.

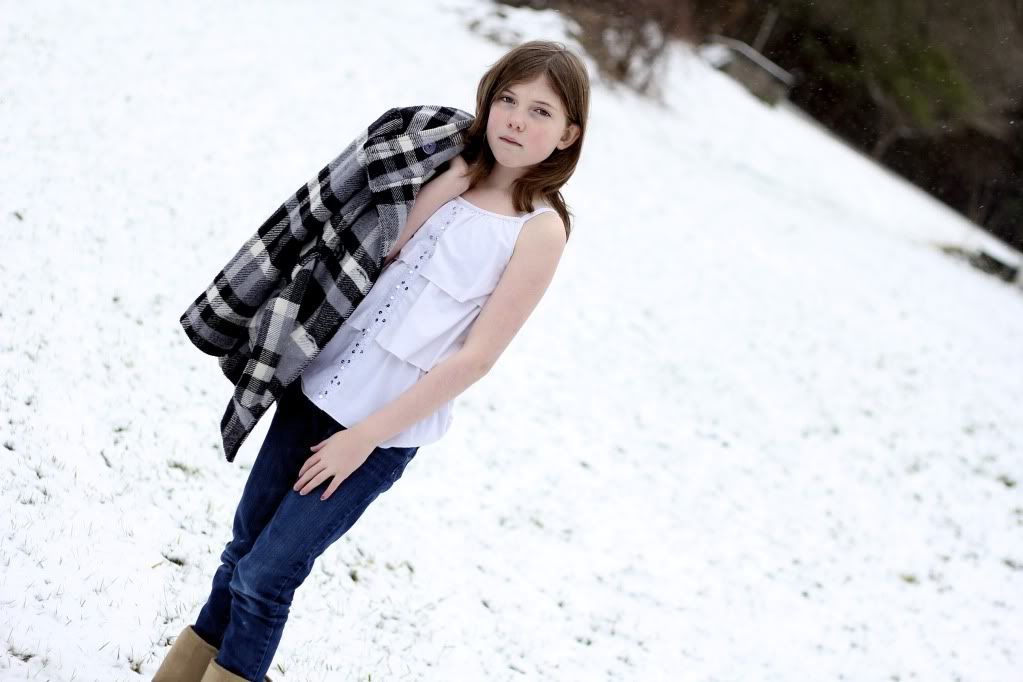
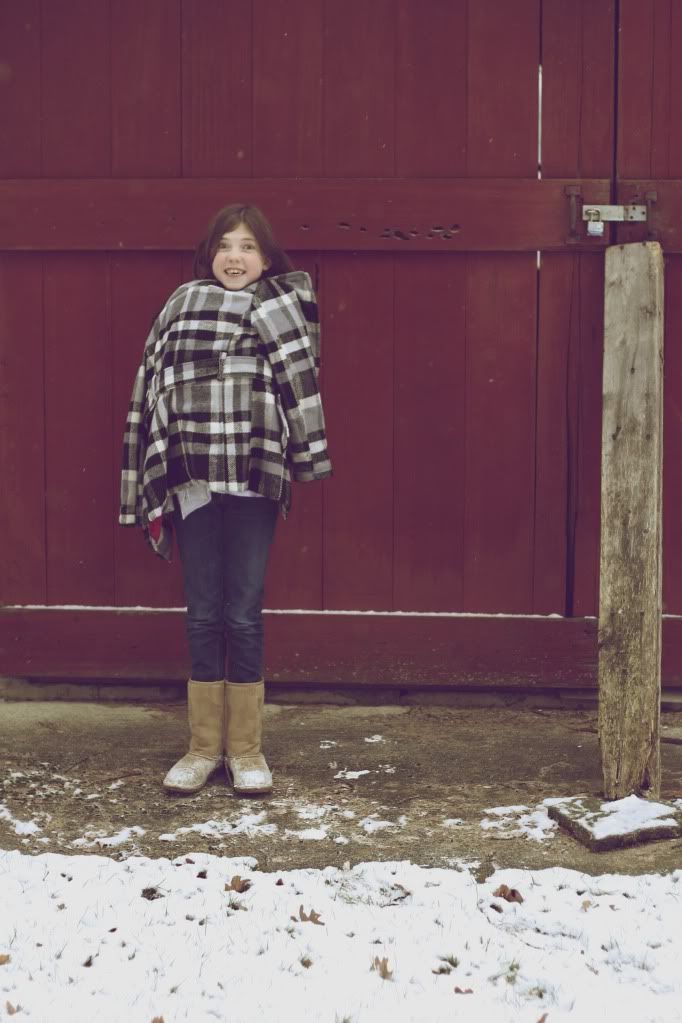
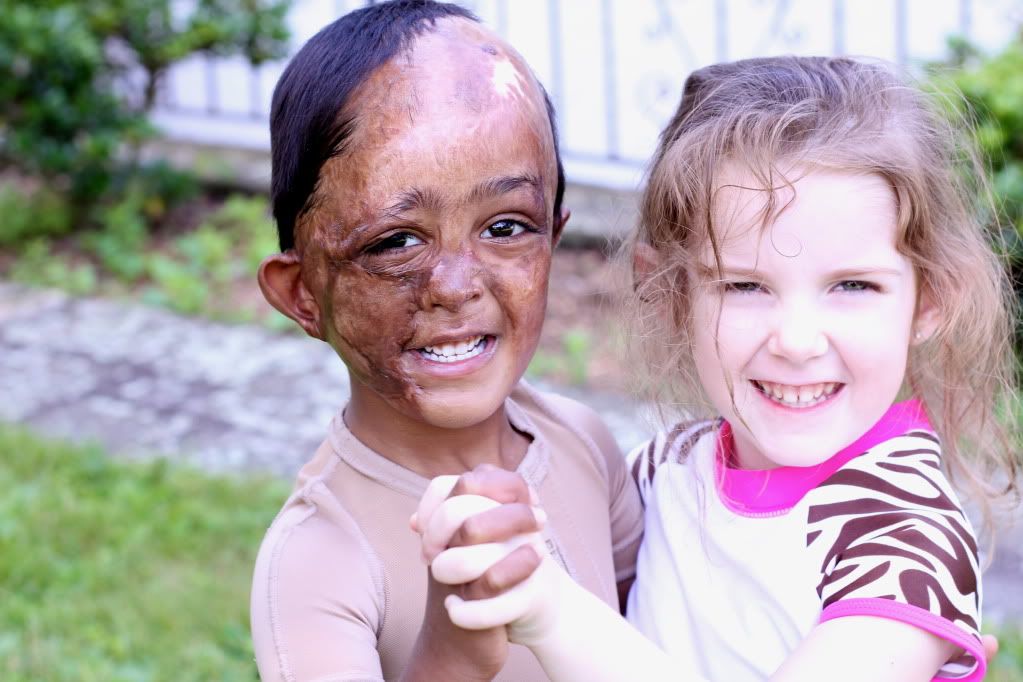
When I first started using my dad's dSLR I had no clue what I was doing.  But I found some great tips from amazing photographers, took the advice of my wonderful blog friends, and learned a lot from just using it.  I'm certainly no professional, but I thought I'd share some tips and illustrate with photos from a recent photo shoot with my sister.


First off, get to know the camera you're using.  If there's a manual, read through it.  If there are buttons, push them.  Trial and error, my friends. Just keep at it.


There are actually settings that can really help, so if you can figure those out, tweak them until your picture looks right. Depending on the type of camera, there may be different settings.  A point and shoot might be able to have an adjusted ISO.  DSLRs will probably have settings like the aperture, ISO, shutter speed and white balance.  For me, there are three things I try to work with to make my pictures look good:  ISO, aperture, shutter speed.

Photobucket

ISO = Pronounced Eye-so, this setting will determine how much light is let in.  The ISO on your camera might have numbers that range anywhere from 100 to 6400.  Start with the lowest ISO possible for clear, sharp images.  If it's really dark, go up from there. Try 200, then 400, then 800, 1600... but the higher you go, the grainier the image becomes.  Unless you want tons of grain, try not to go over 800.


Aperture:  This is tough to explain, so I'm not really going to try to.  If you would like some links to the technical stuff, I'd be happy to give them to you.  But I'm going to cheat and basically tell you the basics.
So, here's the deal.  Aperture determines how wide the hole in your camera is to let in light.  So the lower the aperture (technically it's a higher aperture... I think of it as lower, to help me, though) the wider the hole is and the more light is let in.  So, an aperture of 1.8 would let in more light than 5.0  .
I usually keep it between 1.8 and 4.0 but any will work -- just higher you go, the darker it gets.
Also, the lower the number, the shallower the depth of field is.  So with an aperture of 1.8, the background will be pretty blurred, but can look really nice if the subject is in focus.


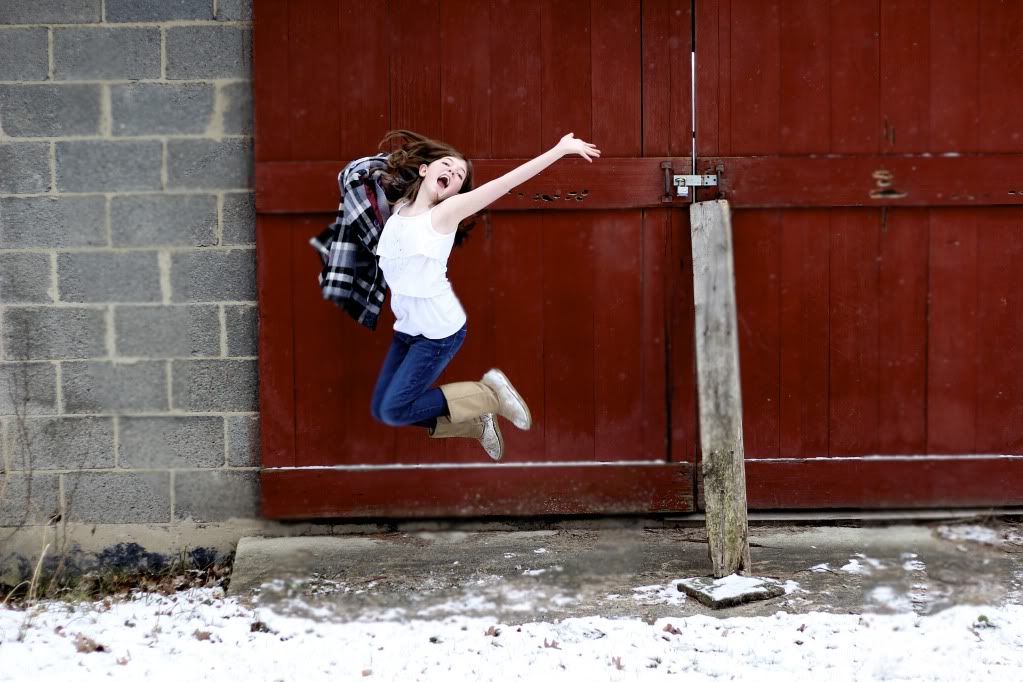
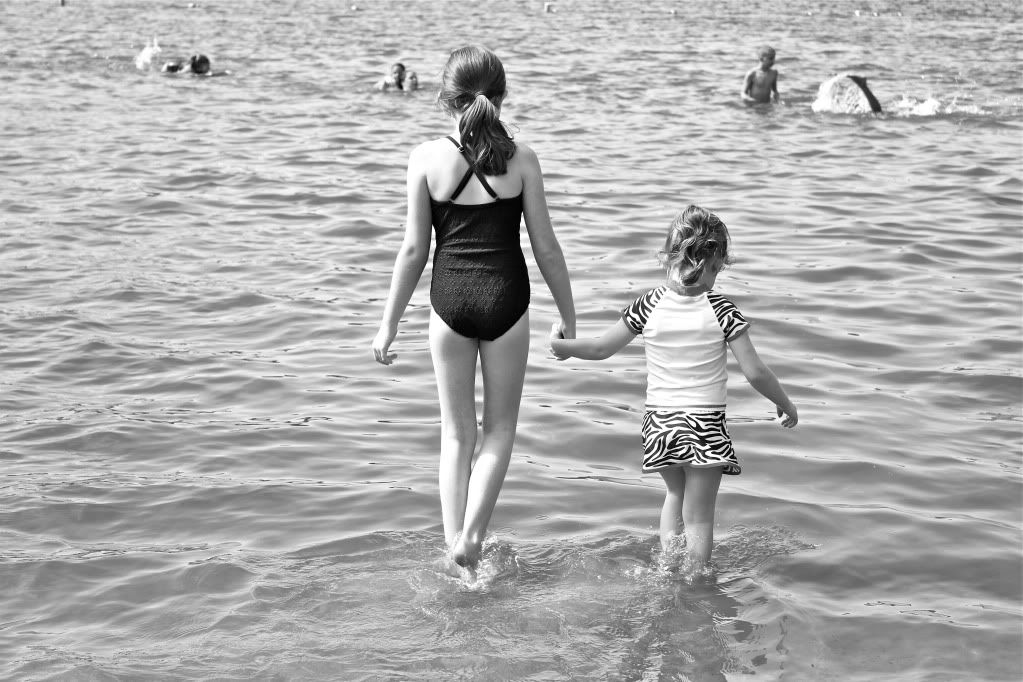
Shutter speed = how fast the camera takes the picture.  So, if it's a shutter speed of 1/80 it will take a second, collect light, take picture.  If you have lots of light, bump it up to around 1/300.  If you're taking pictures of someone, tell them to jump.  Now, snap away.  Since a shutter speed of 1/300 will make it go off really fast, it will freeze the subject and make the image sharper.  I usually try to shoot with a high shutter speed for nice images -- the downside is you need lots of light.  If you're inside, I try to keep it around 1/125.  The photo above was taken with a shutter speed around 1/250 :)


PHEW.  Now that we've gotten that out of the way, have fun! Once you've uploaded your images, edit them!  There are lots of downloadable photo editing softwares out there, and there are also online ones, like picnik.com.  Play around with edits, see what fits you.


Most of all, have fun.  If at first you don't succeed, try, try again! :)

Hey! :)
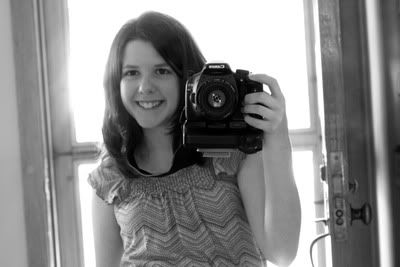
I'm Natalia, and no... I don't really have a mustache.  ;)
Big sister to four little siblings, homeschool student, amateur blogger and aspiring photographer.
Chatterbox, daughter of Jesus Christ, chai drinker, vera bradley lover, girly girl.  I'm not photogenic and I love to stay up late reading Newbery books.
I blog over at The Journal of Natalia Rose.  I write run on sentences, talk about fantabulous events in my life, host giveaways, post pictures.  You're welcome anytime.


{nisfornatalia.com}

Monday, December 5, 2011

christmas cards

Today I went creative and made some Christmas cards for friends...


And just because I can, I took snap shots of my clock and hanging thing-a-ma-gig!


Cool hey? What do you think?

Sunday, September 25, 2011

outfits...what might suit you... {a guest post by bri}

Hello! I'm so happy to be posting over here today! Thank you, Holly! I have recently gotten a real 'passion for fashion' (haha sounds cool hey!?) and so I'd like to share with you some of the ideas I have for how to make it work for you.

Let's start with the basics:

1. Work out what jeans best suit your figure. I tend to go for skinny jeans because I love to wear them under boots. Although bell bottoms can be really funky too! :P


Quick tip:
If you chose to wear bell bottom jeans
make sure that you don't wear lose fitting
or flare-out shirts; putting both flare jeans
and flare shirts together an make you
look bigger than you really are.
2. Find out what colours you suit you. I have olive skin and so I love white and light blue or green shirts. If you have a light skin colour you may want to use colours such as pink, purple, watermelon or even black. You can really have fun by experimenting in front of a mirror with a bunch or different coloured shirts! :)

3. Now you have beautiful jeans and a wonderful shirt you ask yourself what about shoes!? Well, what size are you? I have size 9 feet and I love all kinds of shoes!!! Sometimes it can get hard if you have really large or really small feet, I guess you just have to look at your options. :) I like so many different types of shoes it's not funny! :P Boots are probably my favourite and that's why I love winter! :)
Shoes for you:
If you decided on getting skinny or straight jeans your options are pretty big- boots, flats, high-heels... but if you preferred bell bottoms the best are small boots or flats.

Quick tip:
Never wear high heels
with flare jeans or bell bottoms
unless they are long
enough to cover the heel.


Now that you have a basic outfit let's go more into detail.

4. Earrings:
Sometimes a plane outfit such as a t-shirt, jeans and flats can be dressed up with a funky pair of earrings! I find it best to buy only earring that you love and not cheap ones. It's better to have a few that you will actually use rather than hundreds that clutter your jewellery box! :P

5. Belts:
Hmm, belts. They seem to be always changing style! One minute big brown waist belts are in fashion the next it's better to wear skinny ones over the bottom of your shirt... well, that's what i think anyway! So, I've decided not to go-with-the-flow but to find out what I like wearing and if it suits me! Some people have small waist's and like wearing belts there, others prefer to keep it in the jeans holes. It's really up to you and what you like!

6. Nails:
Scrappy nails with old polish never complement your new dress! Make sure that your nails are trimmed and that the polish goes with your outfit. Black nail polish it my favorite. It goes with everything and can still be cool. I have written a nail care post and a nail painting post, if you want to take a look.
7. Op. shops:
Sometimes the best clothes and jewellery are just waiting for you at an op. shop! The only thing bad about these shops are that It is so time consuming. If you have a Saturday afternoon free it can be so much fun to try out these great vintage shops, you never know what you might find! :)

8. Creating new outfits:
It's amazing how many different outfits can be in your cupboard just waiting for you to find them! Layered shirts can look so great. So if you have the time got to cupboard and try mixing and matching diferent tops together and over each other. It can create a new amazing look that you never new you had! :)

Ok, now here are just a few outfits I’ve created to have a look at:
Top: Kmart// Vest: Valley Girl// Skirt: Just Jeans//

Top: Kmart// Black over top: Kmart// Jeans Kmart//

Top: Target// Pants: Just Jeans// Boots: op. shop// bracelets: Diva// Necklace: Diva// Bureau: Target//

Well, I hope you enjoyed my post and if you have any feed back or questions feel free to email me.

a bit more about me:

My name is Briahna, Bri. I'm home schooled and in a family of 6. I love photography and that's why I started blogging. I enjoy many things such as designing new outfits, shopping, editing photo's, and so much more! I would be thrilled if you would stop by my little blog Diamonds and Pearls.

yeah.... i know crazy picture....i think it's cool though...

Monday, July 25, 2011

Tutorial: How to snap the best nature photographs (guest post by Katie)

Hi there! My name is Briony Katie and I am honored to be guest posting on Roses and Bluebells.
Today I hope to inspire you to get out there and photograph to your heart's content! Since photography is one of my many passions I hope it will become one of yours too.

There are two things that photographers seem drawn to photograph the most. One: People. Two: Nature. Especially nature. You will find scrolling through a photographers portfolio page almost every photo has something to do with nature. You may think that taking a photo of a tree or flower is just aim, ready, snap. No! To take a really good nature photo, you may want to read the following.


Contrast: Before you take a photo of anything not just nature, you must make sure you have the right contrast. All cameras are different. Often, you can adjust the contrast by going to menu, or if you are still stuck, check the instruction manual. If it is sunny outside, adjust the contrast as not to get an awful glare or a washed out look. If it is rainy or grey, adjust the contrast as not to look to dark. It varies and you may have to change as you go along.


Back Light: Make sure your back light photos are not too light or blurred. To get a perfect back light photo, try taking one at sunset when the light is not so harsh. Also, make sure you can actually see the object, the last thing you want is an awful silhouette. Once again contrast is a must.


Rain: One of my most favourite things to photograph is rain drops. Although this may seem easy to do, it is not. To really capture those delicate drops, you have to make sure the focus is on the rain drops and the background blurs out. To do this, lower the mega pixels on your camera and lighten the contrast. The photo can look even better if perhaps the rain drops are sitting on a leaf or flower. Also make sure the photo doesn't look to drab, lots of colour and focus can really bring out the best in your photograph.


Focus: As I mentioned before, having good focus in your photograph can look amazing. If everything in your photograph is in focus, it draws away attention from the main object in your photograph. To get good focus, go to your menu and set your camera to "main focus" (all cameras have this option) and if that does not work, lower the mega pixels and lighten the contrast. Good focus is essential to every photograph.


Props: Now, this may sound a little silly to you, but all photographs even nature ones, could use a prop every now and then. This could be a basket, a book, or even a person. A prop adds more to the photo and gives a certain charm, especially if the prop has something to do with the object. Example: A girl sniffing a flower. Flowers in a basket. The options are endless!


A big thank you to Holly how asked me to guest post, it has been a pleasure. I hope I left all who read this a small bit of inspiration and perhaps a passion for photography.


Hey there! My name is Katie. Lover of photography, writing, art and chocolate. 
My day to day life consists of being home schooled my wonderful mother and learning to get along with my four younger siblings. You are welcome to stop my blog.

Friday, July 22, 2011

making a blog button {guest post by Destiny}

This is me, so psyched to be guest posting on this blog! I was sitting here the other day wondering what I would post about... nothing came to mind! Until a very nice young lady email me, asking me how to make a blog button. BINGO! For this post I will give a nice and sort of easy tutorial on how to make a blog button! Here we go...

Note: This tutorial only works while using PHOTOBUCKET! If you do not have one, I encourage you to go and get one! Its free and it only takes seconds! It makes making a blog button easy.

{1} Go to photobucket and upload an image of your choice, Here is my photo:


Then click "save and continue on to my album"


{2} This should take you to your album (duh) scroll over your image and click on edit, like so: 


{3} the editing page should pop up and from there you can do whatever you want with you image: (All I did with mine is add text)


{4} at the bottom of the editing page there should be three small boxes: (click on replace original)


{5} After clicking that, it should take you to a page with your finished piece: 


Copy the code that's placed beside where it says HTML code (in the box at the bottom right side of the page) 

{6} Now, go to your blogger dashboard and click design on the blog of your choice (if you have more than 1 blog) 


{7} This should take you to the 'Add and arrange page elements' page. There, click on 'add a gadget'. A box like so should pop up:


{8} Scroll down that box until you see this:

then, click on that.

{9} A different (empty) box should appear, in that, you paste you copied code:


{10} Now it's time to fix the code! Please don't give up! It may seem a little hard, but it's really easy if you be careful! 

Your code looks something like this right now: (but instead it's MY code)

<a href="http://s1116.photobucket.com/albums/k579/dezzylou13/?action=view&amp;current=destinybutton1.gif" target="_blank"><img src="http://i1116.photobucket.com/albums/k579/dezzylou13/destinybutton1.gif" border="0" alt="Photobucket"></a>

replace the highlighted part of the code with the URL of your blog.

<a href="http://dezzysblogerificblog.blogspot.com/" target="_blank"><img src="http://i1116.photobucket.com/albums/k579/dezzylou13/destinybutton1.gif" border="0" alt="Photobucket"></a>

{11} Now copy and paste this code directly UNDER your current code:

<textarea cols=”15″ rows=”4″ wrap=”VIRTUAL”>YOUR BUTTONCODE HERE</textarea>

Replace the red text with your current button code, like so: Right now your code should look something like this,

<a href="http://dezzysblogerificblog.blogspot.com/" target="_blank"><img src="http://i1116.photobucket.com/albums/k579/dezzylou13/destinybutton1.gif" border="0" alt="Photobucket"></a>

<textarea cols=”15″ rows=”4″ wrap=”VIRTUAL”>YOUR BUTTONCODE HERE</textarea>

After you paste the top code and put it where the red text is, it should look something like this:

<a href="http://dezzysblogerificblog.blogspot.com/" target="_blank"><img src="http://i1116.photobucket.com/albums/k579/dezzylou13/destinybutton1.gif" border="0" alt="Photobucket" /></a>

<textarea cols="”15″" rows="”4″" wrap="”VIRTUAL”">&lt;a href="http://dezzysblogerificblog.blogspot.com/" target="_blank"&gt;&lt;img src="http://i1116.photobucket.com/albums/k579/dezzylou13/destinybutton1.gif" border="0" alt="Photobucket"&gt;&lt;/a&gt;&lt;br&gt;</textarea>

{12} Now click save and your done!!! Congrats you have made your first blog button! Click on view blog and see how it did for you!

Photobucket

That's all! If it didn't work than just go back and check yourself! Because, I'm 100% sure this tutorial works. 

A bit about the author:
Hello! My name is Destiny! a teenager, a photographer, an artist, a Jesus freak, and a blogger for life! I love capturing God's creation.... especially flowers and such! It's just SO beautiful! I love making people laugh and I enjoy writing. I l'amour Paris and vintage too. Heck, I love a lot of things.... to find more of my writings, feel free to check out my blog, "Sharing Endless L'amour". I hope you enjoyed reading this post :))


Thursday, July 14, 2011

W.O.R.K (A guest post by Big Sister)

Work. The word that makes you groan. But can you imagine what life would be like without work?


We would have no houses. We would have no clothes. We would have no running water. We would have no food. In short, we would be dead. But what if we did only the work which was necessary to do in order to survive? What if we never did housework?


The house would be meters deep in stuff. No one would be able to find anything. Mould would be growing on the roof, dust would be thickly coating everything, the windows would be so dirty that you could not tell them from the walls, laundry would be in huge piles everywhere, the bathroom...(okay, lets not go there), and the dishes....oh dear, the dishes! Can you imagine it?! The mess! The smell! Described in one word: Yuk.


So, now you know why we do housework. Of course, I am sure you already knew, because you are all such smart, wonderful house-cleaner-uppers.


But then, work is so....boring! Especially dishes! (Just a little complaint from me there. You see, our dishwasher is broken. So now it takes about an hour for me to wash eight people's breakfast dishes, instead of the good 'ole half an hour it used to take. But there is some good news. Tomorrow we are getting a new dishwasher! Hooray for dishwashers!)


But guess what!?? Work can actually be...(drum roll)...Fun! And if not fun, tolerable. After all, "There is no such thing as work unless you would rather be doing something else." So if you set your mind to the task, you'll find it gets done in no time.


The Bible has a lot to say about work. So much, in fact, that I could not include it all.

Proverbs 12:24:

"Diligent hands will rule,
But laziness ends in forced labor."

How true is that? If we don't work, our Mothers will make us work!

Proverbs 12:27:

"The lazy do not roast any game,
but the diligent feed on the riches of the hunt."

Proverbs 18:9

"One who is slack in his work
is brother to one who destroys."

(A little scary!)

Proverbs 13: 4

"A sluggards appetite is never filled,
but the desires of the diligent are fully satisfied."

And Jesus would have worked. His father was a carpenter, so that is what Jesus would have apprenticed as. Perhaps when he was younger he helped his mother with the housework.


Have you ever done the fun stuff before your work is finished, then when it is over you look around at the mess and feel just plain yucky? I have. It really is nasty! But oh, how nice rest and recreation is when the work is done! How good one feels! I like it. :)


Well, I hope you have enjoyed this post.

Blessings,

Big Sister


"Work keeps at bay three evils; boredom, vice and need."
- Voltaire


(This topic was suggested to me by my mother when I had no ideas)


About the Author

I am a child of God, and the eldest of six children, homeschooled by a loving Mum. I love all animals, and my special favorites are horses, dogs and cats. I also love reading, especially with a cup of tea or milo in hand. I am always thinking up new stories, and when I write, I can see everything almost as clearly as if I were really there. I love the beauty of God's creation, and the country. Photography is a great way to capture this beauty. Making people happy makes me happy. My favorite kind of music is classical. I take joy in many things, and am fascinated by God's world. If you want to check out my blog, ask someone who knows me to refer you. :)


I'm a Blogger (a Guest Post by Natalia)


I guess it's apparent that I'm a blogger.  I type, I photograph, I think and share my thoughts on a URL.


I've always tried to be a good blogger. I've found some great tips from people, and I thought I'd share some of them with you, to be the best blogger possible, and as most of you girls (or boys) out there with blogs know, a good blog leads to some good followers!

The first thing.
One thing I've always tried to keep in mind when I blog is, "what's my goal?" 
Some blogs are strictly full of photographs from other websites to inspire others.
Other blogs are full of recipes or book reviews to help others out.


Some blogs are to journal, to see the author's progress as they pursue a new hobby, or maybe just a place to post whatever pops into their head.


So when you start a blog, and even after that, keep that goal in mind.


A good design.
Ah, a good design. When visiting new blogs, one thing I'm always drawn to is clean backgrounds with solid colors, like Miss Holly here has. And while there are some cute blog buttons that you know would look great on your sidebar, try to think if it's really necessary, because before you know it, your sidebar is very cluttered!


Try to have your own blog button linking back to your blog, because some people that really love your blog will take the button, and it will help spread the word!


Also, if you have music on your blog, I advise you to switch it to only being played when others play it.


Consistency.
Try to get on a schedule with your posting, if possible. I know it's tough, but for me, I try to blog about three or four times a week. The posts can be any length, any sort of post, but if you post three days in a row, and then your followers don't hear -- er, read -- anything for another two weeks, it can be very awkward.


Everyone loves a good blog hop.
For me, I like to find blogs just by going to a blog I really like, looking through their followers, and clicking on links! It's lots of fun, and you meet lots of new people.  


I also love linking up to  things like Awkward and Awesome Thursday, Wednesday Wishes, and any fun photo challenges going on!


Comment when you get a chance! Don't be overly annoying, but if you leave a good and structured comment, chances are both the author of the blog and her/his readers will want to see who this person is!


Also, while following blogs can get you followers, don't follow a blog if you don't like it! It can lead to lots of awkwardness if they don't follow back, and then you're stuck reading your blog or having to un-follow.


Be a hostess.
Try having giveaways, link-ups and photo challenges! Make sure you come with a confident approach, and if not many people participate, it's not the end of the world.
Giveaways don't have to cost you anything if you contact some Etsy shops asking them to sponsor.
But don't be annoying, and make sure your giveaway will benefit the sponsor more then you, okay? :)


Write with proper grammar, please.
I really don't like reading blogs where all their posts are along the lines of, "so yeah, ill get a real post soon lol, im just sittin here trying to think of wat to say". Make sure you post things others will be comfortable reading.


Step out of your comfort zone.
Now and then, it's nice to switch up the things you usually post about, and to post about something else. This makes it so that the readers won't be bored!


Make your posts interesting.
Spice up your posts with different fonts, colors, and photos! 


Your photos don't have to be professional or anything... even blurry photos help break up longer posts.


Make sure you post details that YOU find interesting. If even you get bored reading it, chances are followers aren't going to care.


Hope these help you to be a good blogger!


About the author.


My name's Natalia. I love photography,blogging and writing. I'm a bookworm and slightly a "Grammar Nazi". But really, I'm just a girl who lives for Christ. Without Jesus, I would be so lost.
I'm sarcastic, a girly girl, and addicted to chocolate of any kind.
It's nice to meet you. 
{click here to visit my blog}